Playing with a Raspberry Pi IR Camera
Introduction
There was a Raspberry Pi IR camera on sale in the last Prime Day sale, so I thought I’d get one and see what it can do. This is an inexpensive 5MP camera that works night or day and cost me $22. Basically this is a chance to get into Raspberry Pi camera support, play with an infrared camera and play with my 3D printer. You can shoot videos, but I haven’t played with this yet. This blog is the start of that journey.
The Camera
The camera arrived in a static envelope with no instructions and in three parts that required bolting together. The bolts are very small and hard to fit in the holes and tighten. For me, it would have been nice if it had come assembled. I suppose some people might like to mount the lights separate from the central camera, perhaps in a specialized case; however, if you do this you will need to solder wires to the circuit boards to make the electrical connections.

Once assembled and connected to my Raspberry Pi, I followed the instructions in the Raspberry Pi Camera guide to access it, but these didn’t work. After a bit of Googling, it turned out this is a legacy camera and the instructions to enable it are a bit different. If there were instructions, it might have been nice to mention this.
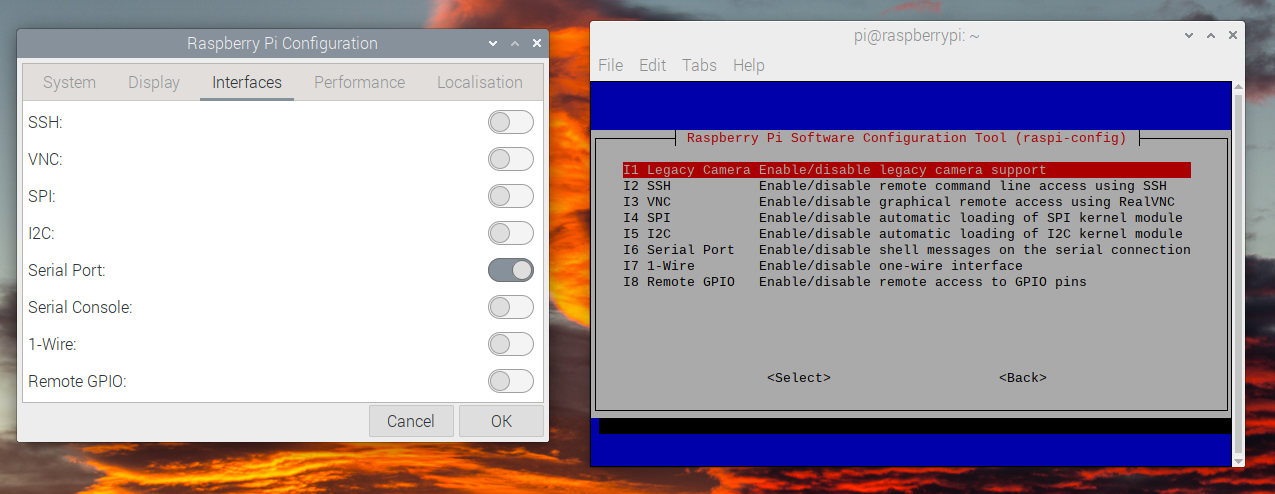
In the above screenshot, notice that the camera doesn’t appear in the newer Raspberry Pi Config GUI, and that you have to use the older character based raspi-config program. The legacy camera appears under “Interfaces”.
Once this was sorted out, the camera works fine.

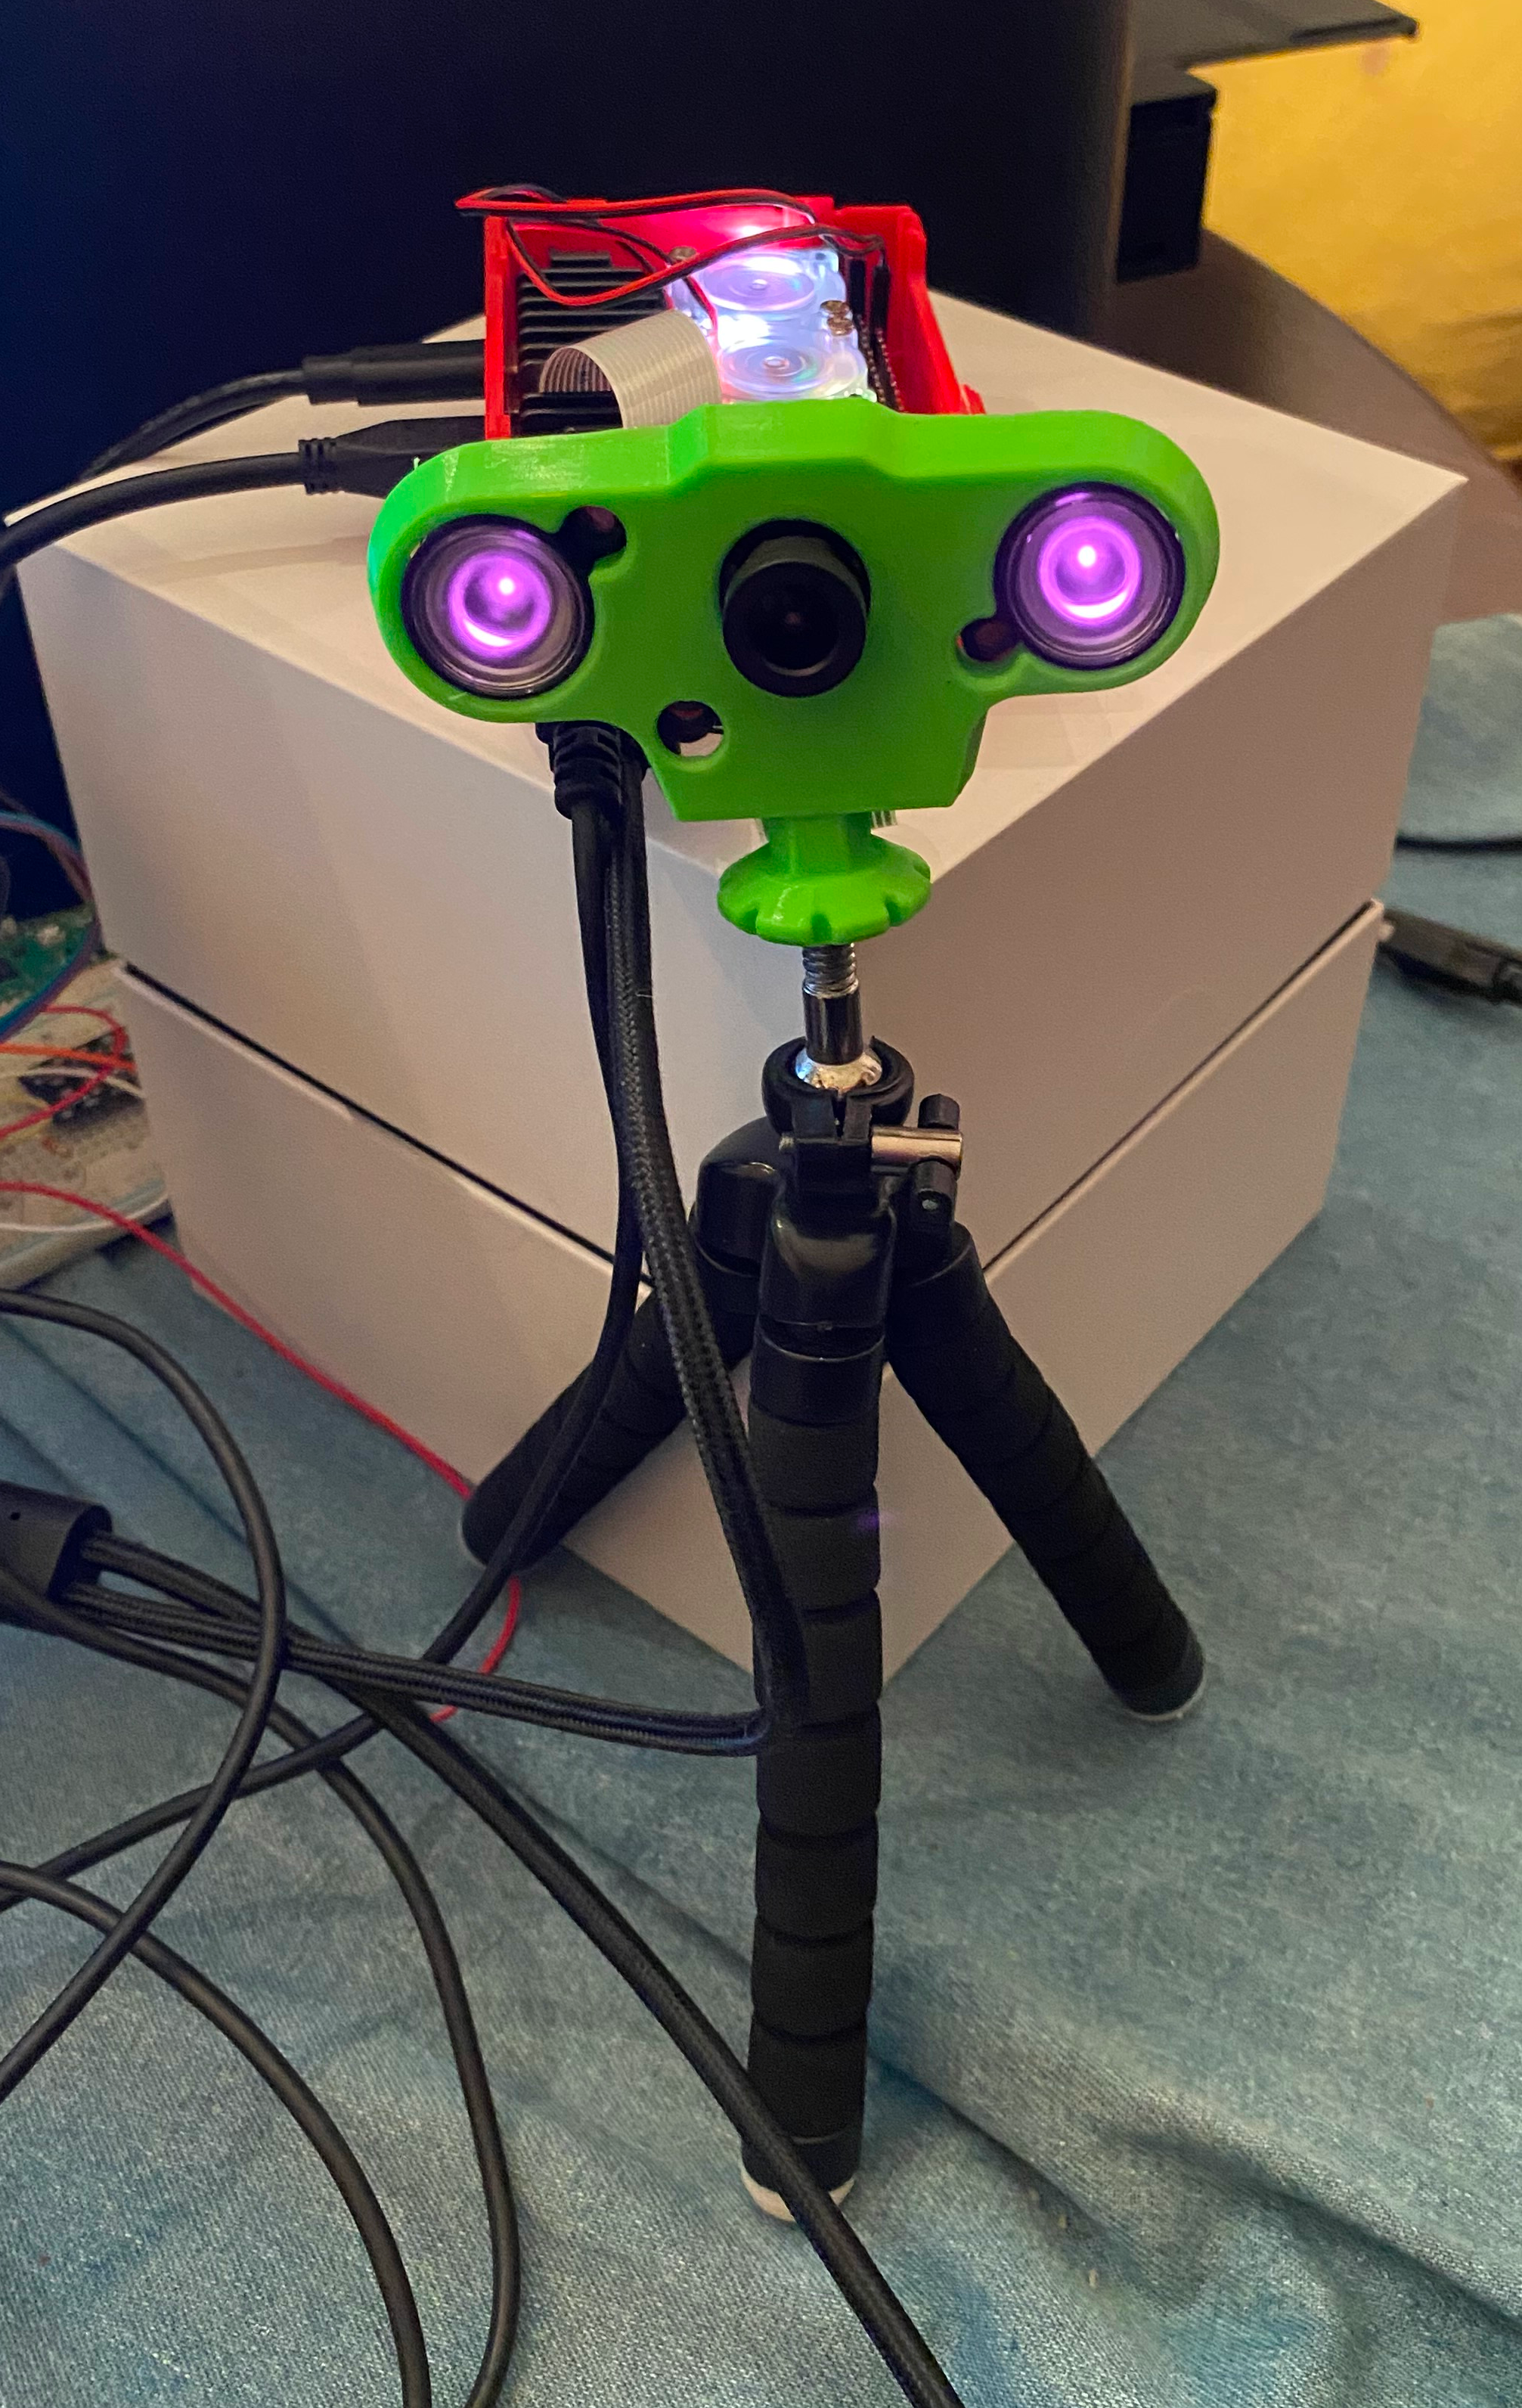
The camera has light sensors, so if you are in daylight it operates as a regular camera. If it is dark, then it switches to IR mode and that resulted in the picture above. Generally it gives quite good results in the house, but I haven’t tried it outdoors to see what its range is.
3D Printing a Case
I found a case to print fairly easily on Thingiverse. When it started printing, I worried that I should have turned it upside down due to all the filling support material being printed. However, once done I understood the reason, which was to do with leaving room for the tripod mount.

Then when the support stuff was removed.
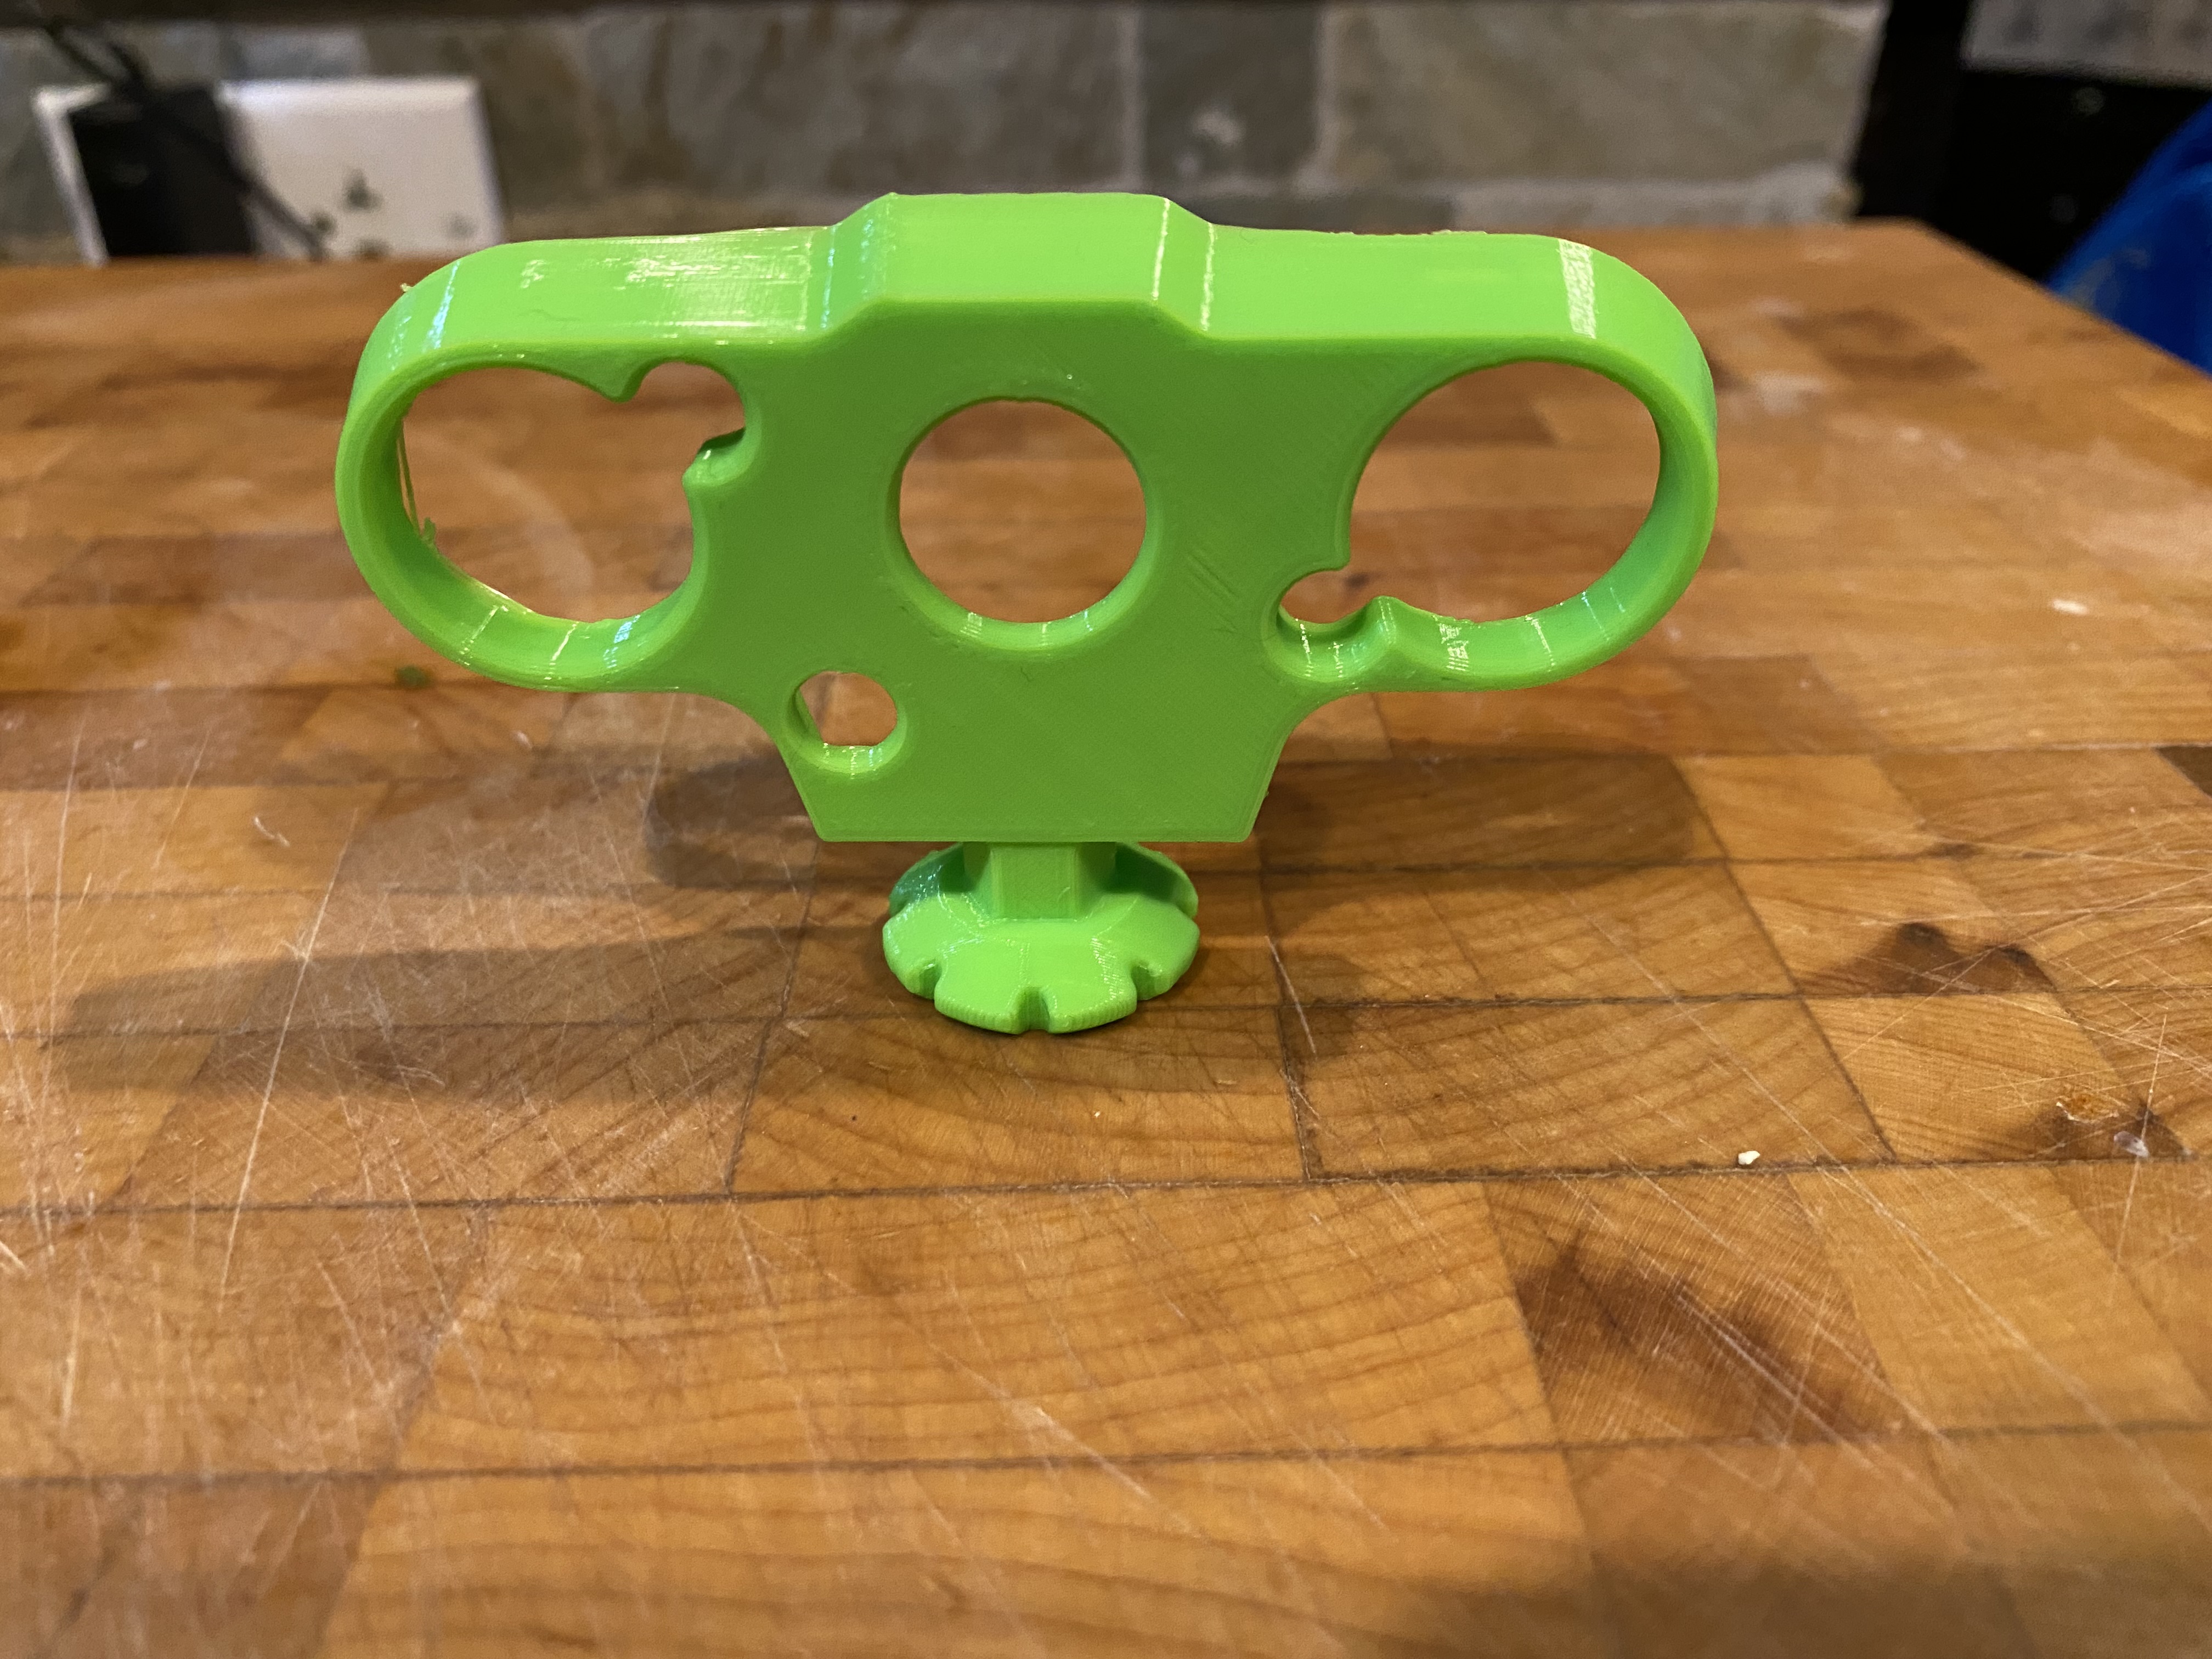
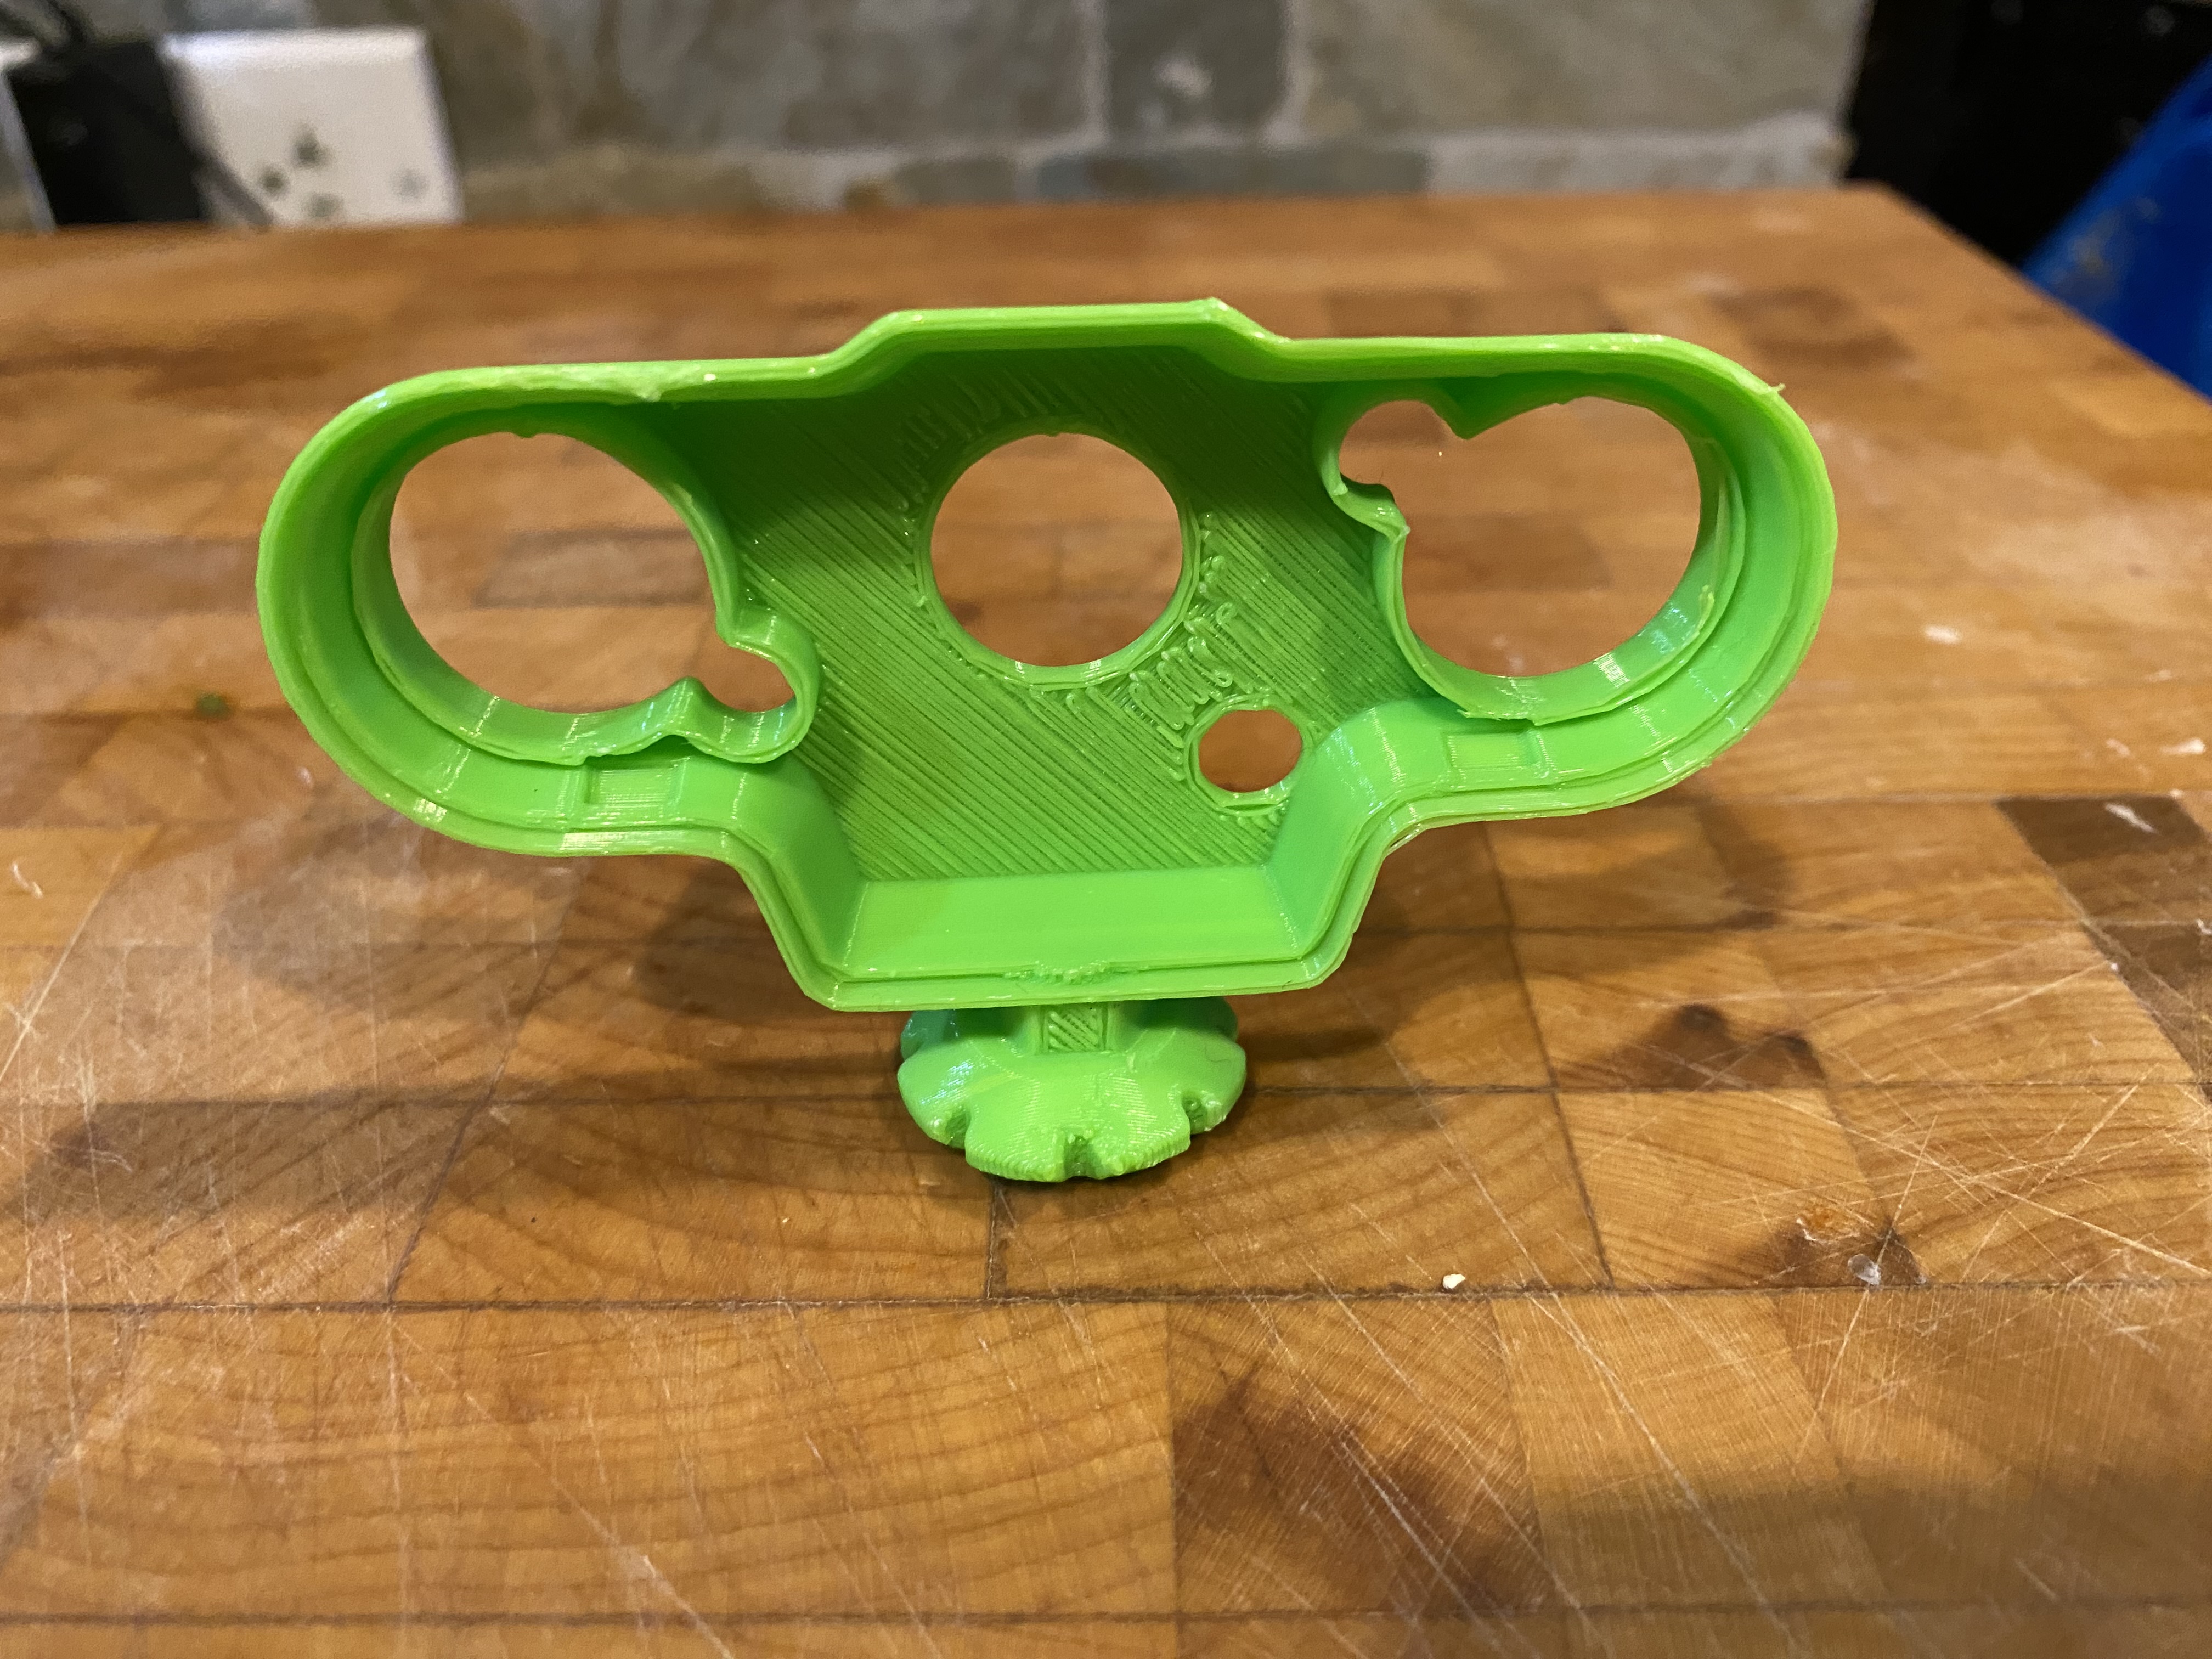
I didn’t bother sanding the inside, since once the camera is inserted, you can’t see the rough parts. If I had turned the model upside down then the support material would have been on the front and it would have taken a lot of sanding to smooth out. Below is the support material that was removed.

Then the assembled final result:
PiCamera
You can take pictures using the Raspberry Pi’s raspistill command such as:
raspistill -o test.jpg
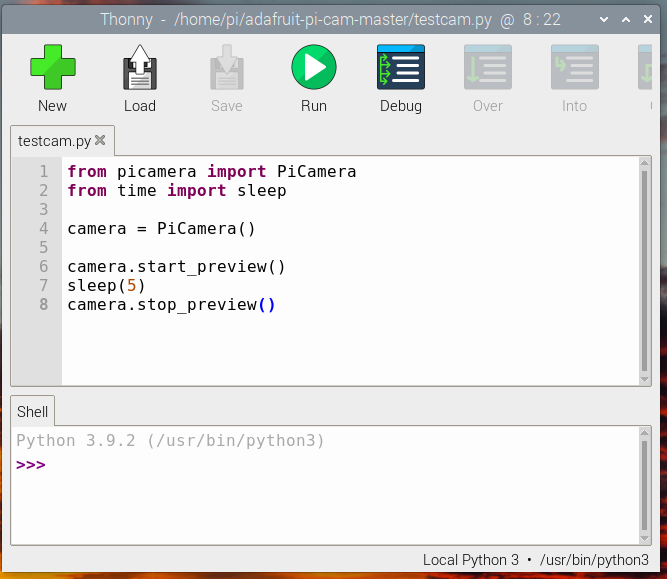
Another way is to write a Python program to control the camera using the PiCamera Python module. Below is the simplest Python program to show a preview window of what the camera is viewing.
Both raspistill and the PiCamera Python module have tons of options to control the camera and these are all well documented in the Raspberry Pi Camera Guide. This is a rabbit hole for another day.
Summary
The Raspberry Pi camera modules are fun to play with, but not always practical. The camera cable is extremely short making it hard to aim the camera. In many ways a stand alone camera that records to either an SD-card or Wifi is much more practical. That being said, people have built standalone cameras this way, including a TFT display, battery pack and button to take the picture. Then bundling it all up in a 3D printed case. This is a great way to learn how a DSLR or point and shoot camera is actually put together. As the Pi camera accessories improve, perhaps one day these DIY cameras can match those from Canon or Nikon.

Leave a comment